Microsoft Office is the world’s largest desktop productivity application suite. It is designed specifically to be used for office or business purposes.
The latest version of Microsoft Office is feature-packed with modern facilities to make office work smooth and easy. Microsoft Office suite is full of features and some of them we are not familiar with at all.
Translate Tool is one of them which lets you translate any document in a snap if you’re working with different languages. I’m presently using Microsoft Office Professional Plus 2016. This feature works slightly in a different way on other versions.
There are two methods to translate documents with Word:
1st Method: In this method, we can use the “Review” tab from the ribbon bar to translate Word document into any desired language.
Step-1.To translate, open a Word document and click the “Review” tab on the ribbon bar and then click the “Choose Translation Language” from the drop-down menu of the “Translate” tab to select a translation language.
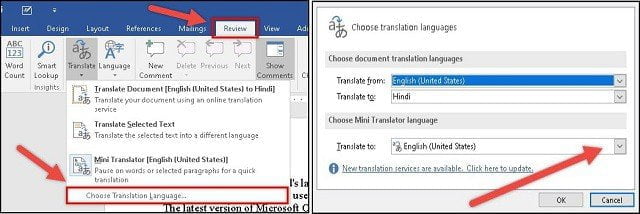
Step-2 After choosing the translation language, there are two options to translate a Word document namely “Translate Document” and “Translate Selected Text“. The first one is used to translate the whole document and the latter is used to translate the selected text and phrases as well as from the Word document.
Translating the whole document
The first way is use to translate the entire Word document from one language to another by using Web Translator.
These are the steps to translate the entire word document:
Step-1 Open a Word document and click on the “Review” tab then click on the “Translate” tab in the language section. Now click on “Translate Document” from the drop-down menu of the “Translate” tab.
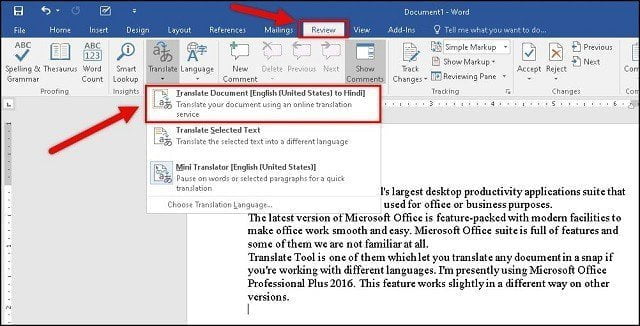
Step-2 After clicking on “Translate Document” a new dialogue box will open to ask us to translate the whole document over the internet. Now click on the “Yes” button to proceed further.

Step-3 After clicking on the “yes” button, the Web Translator web will open in your default browser.
Step-4 Finally, the entire Word document willt ranslate into your preferred language. You can also choose your translation language here if you have not selected it previously.

Translating Selected Texts
The second way is use to translate selected text or a small snippet of words.
These are the steps to translate the selected text:
- Open a Word document and select the desired text to translate into your preferred language.
- Now click on “Translate Selected Text” from the drop-down menu of “Translate“.
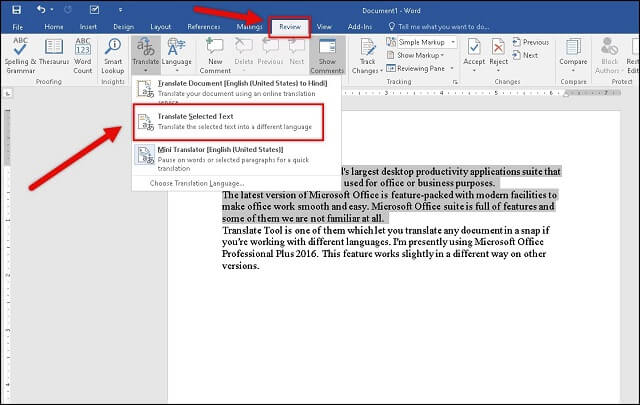
- After clicking on translate selected text a new dialogue box will open asking you to translate the selected text. Now click on the “Yes” button to proceed further.

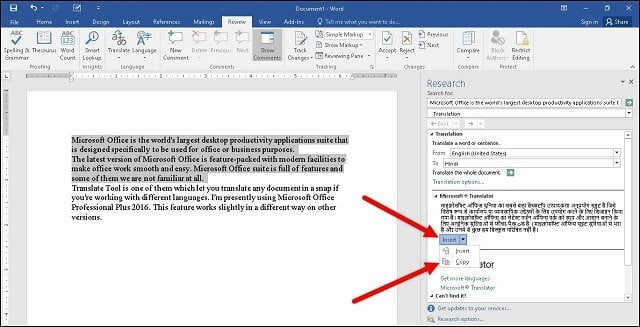
- Hereafter, the translator menu will open on the right-hand side with translated results into your preferred language.
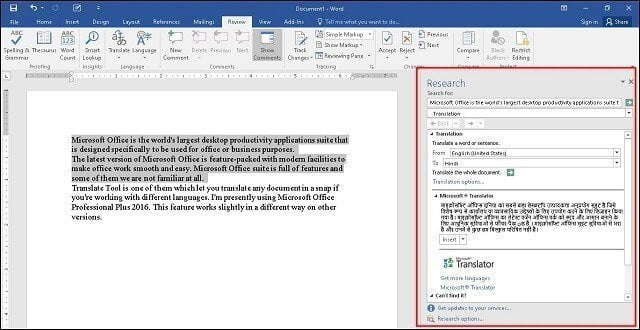
- From here you can replace the original text with translated text by clicking the insert button. If you don’t want to replace the original text then you can copy the translated text.
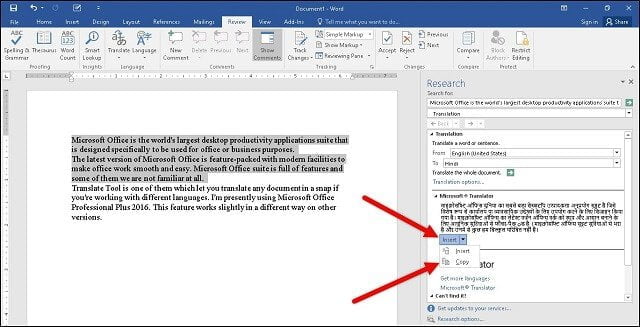
2nd Method: In this method, we can use right-click to translate the selected text from a word document in the preferred language. The second method is much easier and more convenient than the first one.
Here is a simple walkthrough to translate the selected text:
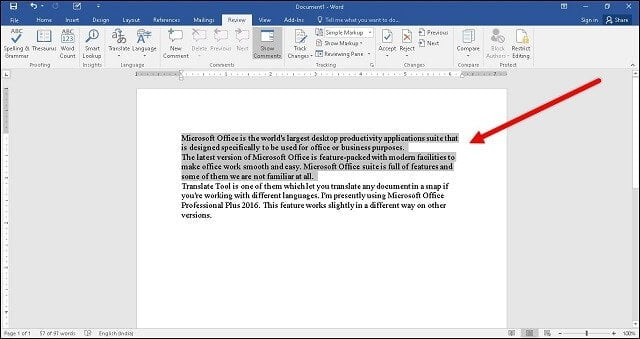
Step-1 Open a Word document and select the desired text to translate into your preferred language.
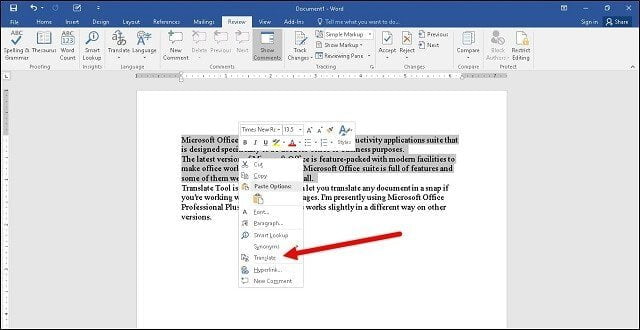
Step-2 After selecting the desired text, click the right-click of your mouse and then click on “translate” from the drop-down menu.
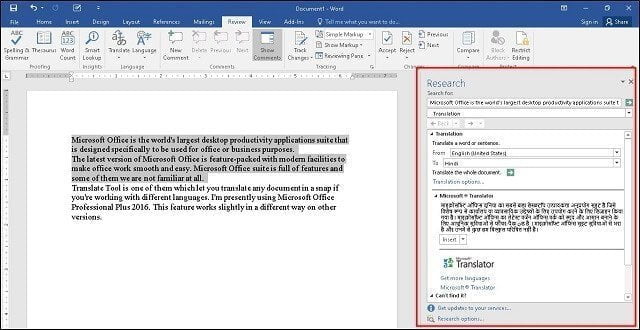
Step-3 The translator menu will now open on the right-hand side with translated results into your preferred language.
Step-4 Finally, you can insert the translated text into your Word document from the insert button if you’re happy with the results. You can also copy the translated text from the insert button’s drop-down menu. If you want to translate the whole document from the translator menu then you have to click on the arrow button which is situated near to ” Translate the whole document”
This is all about how to translate a Word Document into another language. If you still have any questions related to this, please drop your comments in the comments box below.
If you liked this post, please share it with your friends and family. You can spread the word on Facebook, Twitter, WhatsApp, LinkedIn, and Instagram. Your help is greatly appreciated!
To watch our tech videos, please subscribe to our YouTube Channel: Yashraj Solutions
Also Read:
How to Enable and Customize Text Cursor Indicator in Windows 10
Microsoft Data Recovery Tool: Retrieve Deleted Data Easily


