
This post will help you learn how to set a scheduled scan for Windows Defender Antivirus on Windows 10. Windows Defender is a built-in antivirus that comes with Windows 10. It provides robust real-time security protection against all sorts of threats such as malware, viruses, spyware and other security features.
As you know, Windows 10 is one of the best operating systems developed by Microsoft Company shipped with their own form of antivirus software called Windows Defender, Microsoft Defender Antivirus or Windows Security. It is enough to keep your computer machine safe against today’s cyberthreats at no extra cost to you. Windows Security does its job without slowing down your PCs.
Other than that, you don’t need any third-party antivirus software that slows down your system significantly. But Windows Security Antivirus lacks an in-built schedule scan feature like a third-party antivirus program. Antivirus scheduled scans are a necessary part of making sure that your computer system is clean. Scheduled scanning automatically removes malware, spyware, viruses and other harmful applications from your computer device.
Don’t worry, you can schedule a Windows Defender Antivirus scan using the Task Scheduler feature.
How to Setup a Scheduled Scan in Windows Defender Antivirus using Task Scheduler
Here are the detailed steps to set up a scheduled scan for Windows Defender Antivirus:
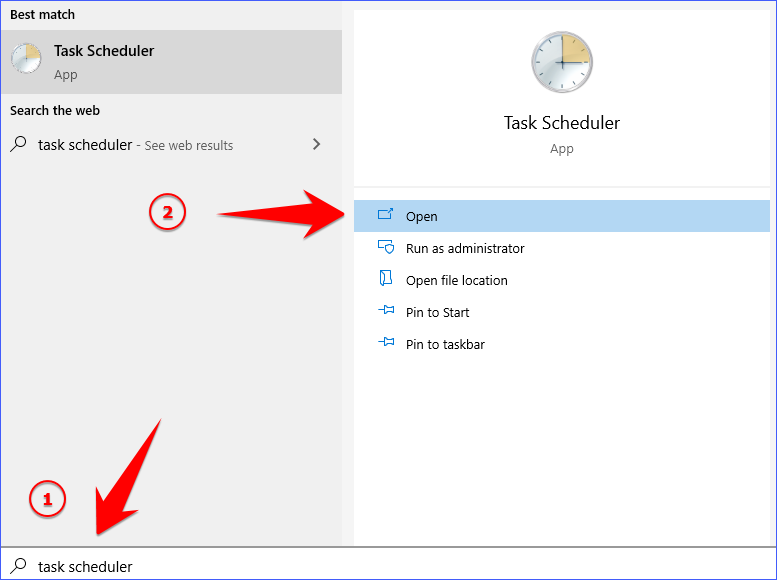
1. Type the Task Scheduler in the search box on your taskbar and click on the open option to open the app.
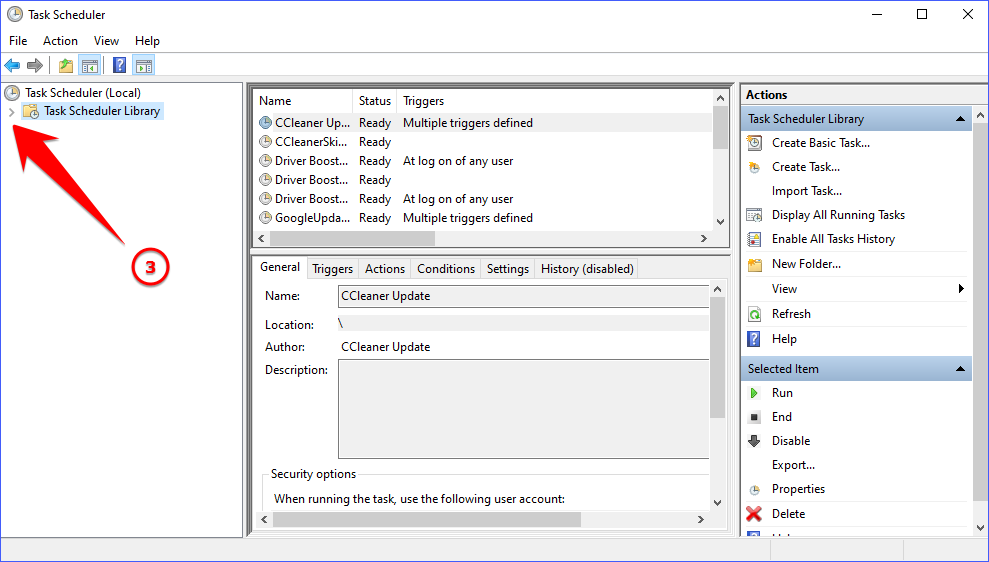
2. In the left pane, click the arrow next to the Task Scheduler Library and navigate to the following Library > Microsoft > Windows and then scroll down a bit and click on the Windows Defender folder.
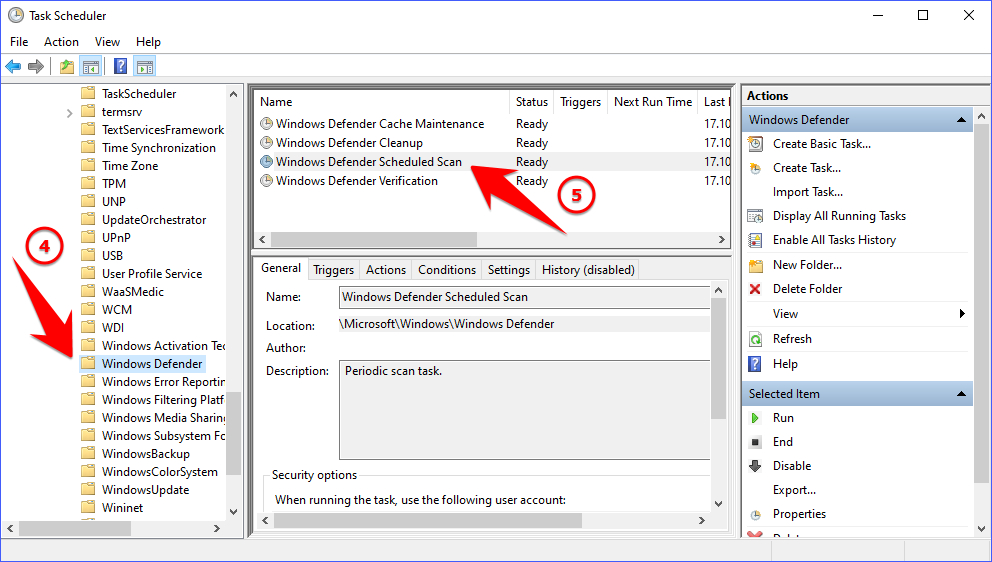
3. After clicking on the Windows Defender folder, expand the top center panel and double-click the Windows Defender Scheduled Scan option.
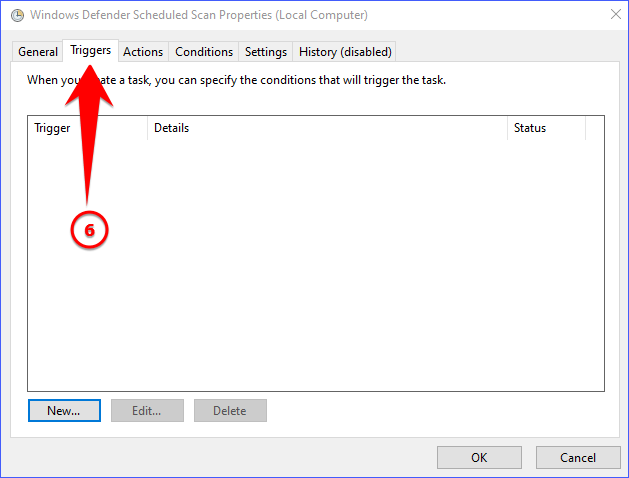
4. On double-clicking Windows Defender Scheduled Scan option, a new window, the Windows Defender Scheduled Scan Properties (Local Computer) will appear. Now select the Triggers tab.
5. Next, click on the New button in the triggers tab section, now a new window will open. Here you have to select one of the triggers including On a schedule, At log on, At startup, On idle, On an event and many more from the drop-down menu of the Begin the task. For this tutorial I’m going to select On a schedule.
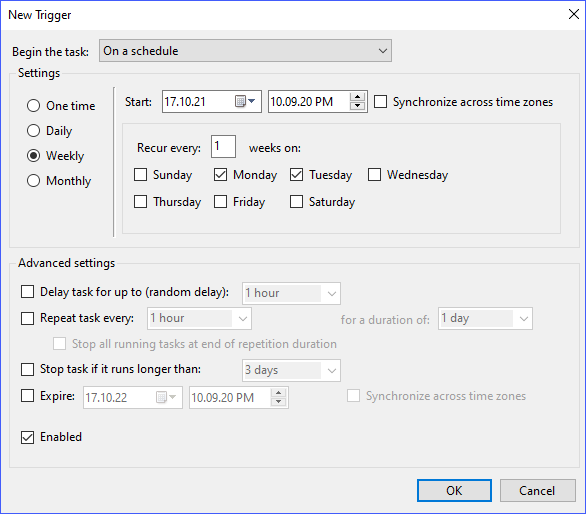
6. Next you can select One time, Daily, Weekly or Monthly according to the best situation that suits you.
7. After this, you can specify the time and frequency to recur the task. For the weekly option, you can also select the day of the week to perform a scheduled scan.
8. Finally, click the OK button.
So this was all about how to set a scheduled scan in Windows Defender Antivirus, if you still have any questions regarding this, please drop your queries in the comments section below.
If you enjoyed this post, I’d be very grateful if you’d help to spread it to your friends and family members or share it on Facebook, Twitter, WhatsApp, LinkedIn and Instagram.
To watch our tech videos, please subscribe to our YouTube Channel: Yashraj Solutions
Also Read:
Install Software in One Click on New Windows Laptop
How to Remove Protection History from Windows Defender